
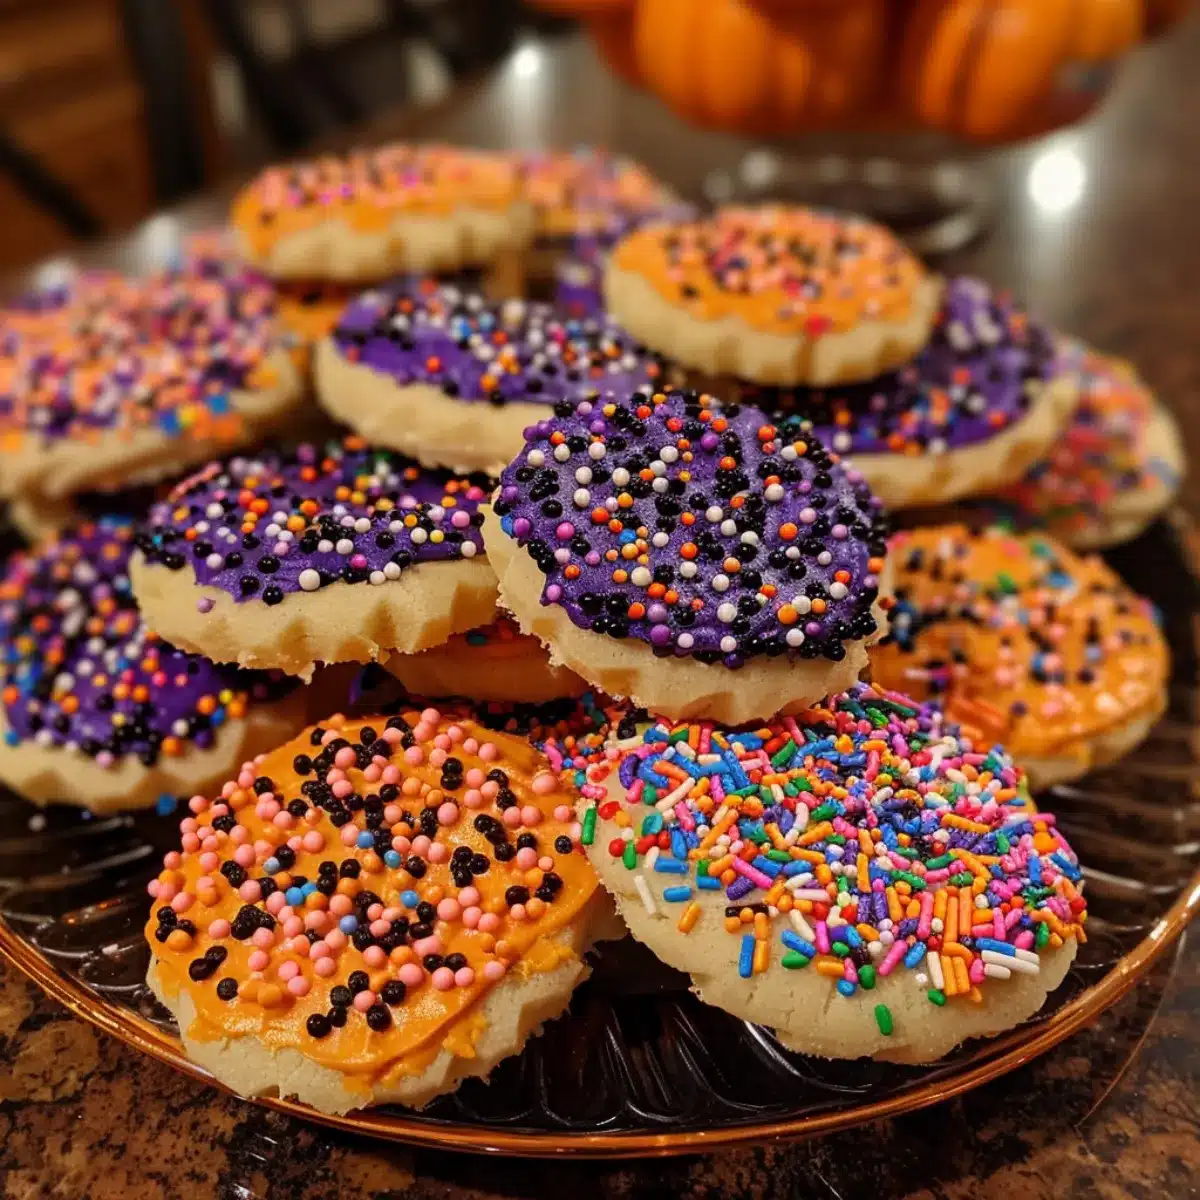
If you’re looking for a festive and easy treat to bring to your Halloween celebrations, these Halloween Sprinkle Sugar Cookies are the perfect choice. Soft, buttery, and melt-in-your-mouth delicious, they’re decorated with colorful sprinkles and spooky-themed icing that kids and adults will love. Whether you’re hosting a party, packing them for school events, or simply enjoying a cozy night in, these cookies add a fun and festive touch to the season. Plus, they’re simple to make and can be customized with your favorite Halloween colors and toppings!
Ingredients
- 2 ¾ cups all-purpose flour
- 1 teaspoon baking soda
- ½ teaspoon baking powder
- ½ teaspoon salt
- 1 cup unsalted butter, softened
- 1 ½ cups granulated sugar
- 1 large egg
- 1 teaspoon vanilla extract
- ½ teaspoon almond extract (optional)
- 3 tablespoons milk
- Halloween-colored sprinkles (orange, purple, black, etc.)
- Food coloring (orange and purple, for icing if desired)
- 2 cups powdered sugar (for icing)
- 2–3 tablespoons milk (for icing)
Preparation Steps
Step 1: Mix Dry Ingredients
- In a medium bowl, whisk together flour, baking soda, baking powder, and salt. Set aside.
Step 2: Cream Butter and Sugar
- In a large mixing bowl, cream softened butter and sugar until light and fluffy using a hand or stand mixer.
Step 3: Add Wet Ingredients
- Beat in egg, vanilla, and almond extract. Gradually add milk to keep the dough soft.
Step 4: Combine with Dry Mix
- Slowly add the dry ingredients into the wet mixture. Mix until dough forms. Cover and refrigerate for 1 hour.
Step 5: Shape and Bake
- Preheat oven to 350°F (175°C). Roll dough into small balls, place them on a lined baking sheet, and slightly flatten with the bottom of a glass. Bake for 8–10 minutes until edges are set but centers are soft. Cool completely.
Step 6: Decorate with Icing & Sprinkles
- Mix powdered sugar and milk to form a smooth icing. Divide into bowls and tint with food coloring (orange and purple). Spread icing on cooled cookies and top with Halloween sprinkles.
Variation
- Chocolate Sugar Cookies: Add ½ cup cocoa powder to the dry mix for a chocolate version.
- Pumpkin Spice Flavor: Add 1 teaspoon pumpkin spice to bring a fall twist.
- Buttercream Frosting: Use fluffy buttercream instead of glaze for richer cookies.
Cooking Notes
- Don’t overbake—cookies should look slightly underdone when pulled from the oven for a soft texture.
- Chill the dough to prevent spreading.
- Use parchment paper to keep cookies from sticking.
Serving Suggestions
- Serve on a Halloween party platter with other spooky treats.
- Pair with hot cocoa or apple cider for a cozy fall snack.
- Wrap in Halloween-themed bags for trick-or-treaters or school parties.
Tips
- If you want vibrant icing, use gel food coloring instead of liquid.
- Add extra sprinkles before baking for a baked-in crunch.
- Store cookies in an airtight container for up to 5 days.
Prep Time / Cooking Time / Total Time
- Prep Time: 20 minutes
- Cooking Time: 10 minutes
- Total Time: 30 minutes (plus chilling)
Nutritional Info (per cookie, approx.)
- Calories: 165
- Protein: 2 g
- Sodium: 110 mg
FAQs
Q1: Can I freeze Halloween sugar cookies?
- Yes! Freeze un-iced cookies for up to 3 months. Thaw, then frost and decorate.
Q2: Can I make these ahead of time?
- Yes, the dough can be refrigerated for 2 days before baking.
Q3: How can I keep the cookies soft?
- Store them with a slice of bread in the container to keep them moist.
Q4: Can I use store-bought frosting?
- Absolutely, but homemade icing holds sprinkles better.
Q5: Can I make them gluten-free?
- Yes, swap the flour for a 1:1 gluten-free baking blend.
Conclusion
These Halloween Sprinkle Sugar Cookies are the ultimate party treat for spooky season. They’re colorful, fun, and so simple to make that even beginners can whip them up with ease. With endless decorating possibilities, they’re a great way to get kids involved in Halloween baking while creating a festive dessert that’s sure to impress. Serve them at parties, gift them in cute treat bags, or enjoy them fresh with a cup of cocoa — either way, they’ll be a Halloween hit!